If you’re experiencing Wi-Fi and network problems on your MacBook, there are several troubleshooting steps you can try to resolve the issue.
Mac Contents:
Here’s a step-by-step guide to help you fix Wi-Fi and network problems on your MacBook:
1-Restart your MacBook:
- Go to the Apple menu in the top-left corner of your screen.
- Choose “Restart” from the dropdown menu.
- Allow your MacBook to shut down and reboot.
2-Check Wi-Fi connection:
- Click on the Wi-Fi icon in the menu bar (top-right corner of the screen).
- Make sure the Wi-Fi is turned on (the Wi-Fi icon should be black, not grayed out).
- Check if your desired network is selected. If not, click on it to connect.
3-Move closer to the router:
- If you’re experiencing weak or intermittent Wi-Fi signals, try moving closer to your Wi-Fi router.
- Thick walls or long distances from the router can weaken the Wi-Fi signal strength.
4-Restart your router:
- Locate your Wi-Fi router or modem and find the power button.
- Power off your router by pressing the power button or unplugging it.
- Wait for about 10-20 seconds.
- Power on your router by pressing the power button or plugging it back in.
- Allow the router to start up fully before attempting to connect to Wi-Fi.
5-Forget and reconnect to the network:
- Click on the Wi-Fi icon in the menu bar and select “Open Network Preferences.”
- In the Network Preferences window, click on “Advanced” at the bottom-right corner.
- In the list of preferred networks, find the network causing problems and select it.
- Click on the “-” button below the list to remove the network.
- Click “OK” and then reconnect to the network by selecting it from the Wi-Fi menu.
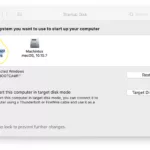
6-Reset the SMC and NVRAM:
- Resetting the SMC and NVRAM can help resolve various hardware-related issues.
- The process to reset these varies depending on your MacBook model. Search for “how to reset SMC and NVRAM on MacBook [your model]” on Apple’s support website for specific instructions.
7-Update macOS:
- Go to the Apple menu and select “System Preferences.”
- Choose “Software Update.”
- If any updates are available, click “Update Now” to install them.
- Keeping your macOS up to date can address compatibility issues and bugs affecting network connectivity.
8-Disable Wi-Fi network extensions:
- If you have installed any third-party Wi-Fi network extensions or software, they might interfere with your Wi-Fi connection.
- Temporarily disable these extensions or software and check if the problem persists.
9-Create a new network location:
- Open “System Preferences” from the Apple menu.
- Select “Network.”
- Click on the gear icon at the bottom-left corner of the Network Preferences window.
- Choose “Make Service Active.”
- Give the new network location a name and click “Done.”
- Try connecting to the Wi-Fi network again.
10-Contact your ISP or network administrator:
- If none of the above steps resolve the issue, it’s possible that the problem lies with your internet service provider (ISP) or network configuration.
- Reach out to your ISP or network administrator for further assistance and troubleshooting.
By following these steps, you should be able to troubleshoot and resolve most Wi-Fi and network problems on your MacBook.